Hello Awesome Readers!
I tried on making some sweets again for myself, family and
loved ones. I have been making Tiramisu for the family for more than years now
and I want to elevate my skills. Lol! Then I saw this really good tutorial on Facebook
on how to make No-Bake Strawberry Tart and I was inspired to give it a try and
give it my own twist.
I have yet to buy an oven at home so I can bake more sweets
and cakes but for now, I am eager to try a variety of no-bake treats for my
family.
I am pretty happy with the outcome on this experiment and I
can’t wait to share to you guys the recipe.
To start of your No-Bake Strawberry Tart, you will need the
following:
1. All Purpose Cream
2. Condensed Milk
3. Crashed Graham
4. Butter
5. Strawberry
2. Condensed Milk
3. Crashed Graham
4. Butter
5. Strawberry
STEP 1:
Keep your All Purpose Creams in the chiller overnight to
achieve an ice-cream like consistency.
STEP 2:
Melt butter in a pan. Take about ¼ of butter.
STEP 3:
Mix in your crashed graham with butter. Mix until you get
this kind of consistency.
STEP 4:
Lay the graham on to the pan and mould it according to the
shape of your container. Make the layer thicker according to your liking.
STEP 5:
Keep the graham layer in the refrigerator for the mean time
to let it harden and start working on your cream.
Mix the All Purpose cream and Condensed milk very well. Mix
it thoroughly until you don’t see any bubbles or solid creams in the mixture
anymore.
STEP 6:
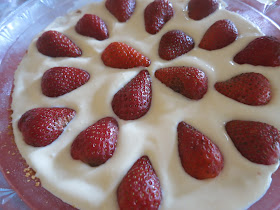
Pour in the cream to the graham layer and flatten the top.
STEP 7:
Slice the strawberries and start decorating your Strawberry
Tart.
FINAL STEP:
Let it cool in the chiller or freezer overnight then ENJOY!
I wasn’t able to let mine cool overnight so the base wasn’t
so hard yet but next time I will be sure to do this overnight.
My family especially my nephew and Pagibig loved my No-Bake
Strawberry Tart creation! I am so glad they did and I can’t wait to make more
sweets for them soon!
Have you tried No-Bake recipes before?
What‘s your favourite?
Thank you for reading?
Till next post!
LOVE,
ARRIENNE


No comments:
Post a Comment
Awesome Reader Comments~